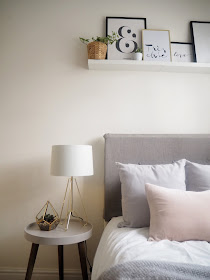
I've been lusting over one of those beautiful upholstered headboards for so long, and when I decided I was going to give our spare room a Scandi-inspired makeover, I knew I had to have one. However, after being unable to find one for less than about £150 the only option I had was to try and make my own! So I thought I'd show you how I did it - for less than £40 and in no more than three hours.
What you'll need
MDF board - I picked up this one from Homebase for £6.99, however I was making one for a single bed, so if you're making one for a double or larger, bear in mind this will probably be slightly more expensive
Foam block - Mine is 2 inches thick
Material - I would recommend using thick material, I went for this herringbone style fabric from Dunelm
Staple Gun
Long embroidery needle
Embroidery thread
Fabric buttons - I couldn't find any that matched my material well enough, so had to cover some fabric ones using some offcuts and PVA glue!
Drill
Tape measure
Wall attachments
How I did it
- Firstly I cut the board and foam to size, which, for me was 97cm wide (please note I was making one for a single bed)
- Next, decide where you want to place the buttons. I've got two along the top row and three along the bottom, and drill your holes
- Place the foam on top of the board and then the material on top. Double check you're happy with the way the material looks here, especially if its patterned, then staple the material to the board. Be sure to pull the material as tight as you can
- Now for the tricky bit - placing the buttons, and I'm not going to lie this was the bit that took longer than I thought it would. You'll need a long embroidery needle to push the thread through the hole from the back, through the foam and material, and then thread the button on before threading the needle back through the foam and the hole in the board - which was the tricky bit. I found it helped to push another needle through the hole to use as a guide
- Tie the embroidery thread at the back, and staple them down, pulling the button as tight as you can
- Now you'll need to attach the board to the wall, I've used two hooks - one screwed into the wall, and one attached to the hardboard.
Thanks for reading,
Sam Xx
Want to return to this post later? Pin the image below:


No comments
Post a Comment