I mean - is there a more perfect combo than baskets and pom poms? (The correct answer to this is no, obviously) I've had my eye on a beautiful pom pom belly basket for a while, but instead of shelling out a small fortune decided to have a go at putting my own together first. This entire DIY cost me £10 - probably a quarter of the price of some of those I've seen on the high street! Plus its ridiculously easy, so you can't go wrong.
There are various contraptions you can buy to make pom poms, however I've never bothered with them - some good old cardboard and sellotape is all you need!
You will need:
Belly basket - Mine is from IKEA for £10, however I've found this identical one on eBay for even cheaper at £5.49
A ball of wool (I used some old wool I had lying around, however I found this wool for £1.35 a ball after another quick eBay search)
A ball of wool (I used some old wool I had lying around, however I found this wool for £1.35 a ball after another quick eBay search)
Cardboard
Scissors
Sellotape
Before you start
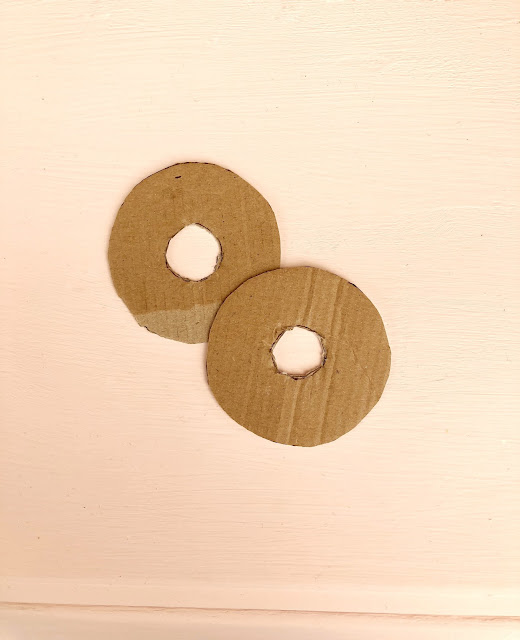
Measure and cut out two cardboard rings. Mine were 6cm in diameter, with a hole in the middle measuring 2cm across, however go for whatever size you want. You'll need two rings for each pom pom you plan on making. You can cut out enough rings - or if you're super lazy like me, just re-use the two rings by taping them back up after making each pom pom (I told you this would be cheap!)
- Place the two cardboard rings on top of each other
- Cut a long length of wool - the more wool you use, the fluffier your pom pom will be (mine was 10m)
Making your pom pom
1. Wrap the wool around the rings working from outside to in, leaving a small length poking out
2. Keep wrapping until you've filled the entire ring, making sure to layer the wool up on top of itself. If you find you haven't got enough wool, or you've used the length up too quickly, just cut another length and continue wrapping where you left off
3. Once you're all finished you now need to cut the wool around the outside edge of the circle. The best way to do this it to slip the scissors between the rings (this is why you need two!), and work your way around snipping the wool
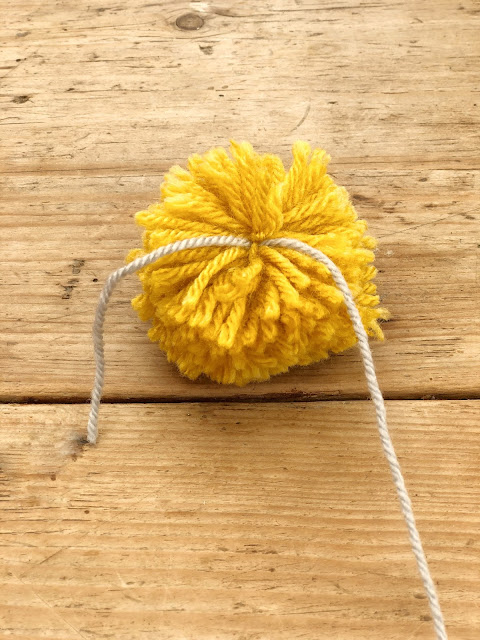
4. Once you've trimmed all the way round, place a short length of wool between the two cardboard rings and tie a double knot to hold it all in place
5. Now snip the cardboard to get the pom pom out - be careful not to cut any bits of wool!
4. Once you've trimmed all the way round, place a short length of wool between the two cardboard rings and tie a double knot to hold it all in place
5. Now snip the cardboard to get the pom pom out - be careful not to cut any bits of wool!
6. Once you're all finished and have removed both bits of card, fluff your pom pom up and trim any longer pieces so its symmetrical
Repeat for as many pom poms as you wish - I've gone with three - if you want to re-use the same card rings like I do, just tape up the cut.
To attach to the basket
To attach to the basket
Cut a length of wool, and string your Pom poms on. To do this just slip the end of the wool under the piece you knotted together in the middle to hold it all in place.
Slip all the Pom poms on and move them about on the line as much as you like, and then attach to the handles of the basket.
Hope this is helpful! Don't forget to tag me in your creations on Instagram if you make your own - I'd love to have a look!


No comments
Post a Comment