I'm ashamed to say our downstairs toilet has been neglected since we moved in. Aside from shoving some prints up, it's barely been touched over the past four years, and has been crying out for a revamp. Enter Pinterest. After spending most of the Christmas break swooning over beautiful WC's, I had my heart set on a Victorian-style loo - think traditional-style panelling and ceramic tiles. However, due to an awkward shaped space, a radiator fitted too close to the wall and minimal tools, this proved to be trickier than first thought! I didn't let that stop me though, and decided to go about DIY-ing myself to a quick-fix version of the loo of my dreams!
This is the before - I told you it was gruesome.
The first thing I did was tackle those horrendous beige tiles. Unfortunately due to the fact that I'm short on both funds and DIY skills, new tiles weren't really an option so I had to settle with painting them white using Wilko Tile Paint. It's not a long-term solution, however for now they look so much better and brighter, and definitely don't stand out as much.
Onto the walls where I've used pine planks to create the illusion of wooden panelling. Seeing as said DIY skills are at a minimum I bought some pre-cut pine from B&Q (mdf sheets would perhaps be a better option if you have your own tools), which I then cut down to size using a hand saw and stuck to the wall using No More Nails glue. Make sure you measure your space and you're completely happy with where the wood will go before you stick them to the wall - that stuff is surprisingly strong! I made lots of marks on the wall with pencil before deciding exactly where I wanted my panelling to sit on the wall.
The planks I've used to create my 'panels' are 15mm thick and 68mm wide. They're £6.41 each and I needed five.
I then primed and painted the planks while they were on the wall. This was the tricky bit, and is basically why its taken me weeks to finish. I knew I wanted a dark colour to contrast against the panelling, plus I've been dying to go dark somewhere for ages - so figured the smallest and least important room would be the best option, right? Wrong. The fact that we get almost no natural light in there meant none of the colours I wanted were going to work. The navy I fell in love with looked like black, and a dark grey was coming out a khaki green?! The same was true for all the whites I tried, a lot of which looked more like clotted cream in colour. So I settled for Trilby by Earthborne Paints, a mid-grey for the walls, and Farrow & Ball All White for the panels (deciding which way round to have them was another saga!). I always get my paint colour matched by Decorating Centre Online, which saved me over half the price.
 |
| About the point when I was regretting the dark colour - could I really pull it off?! |
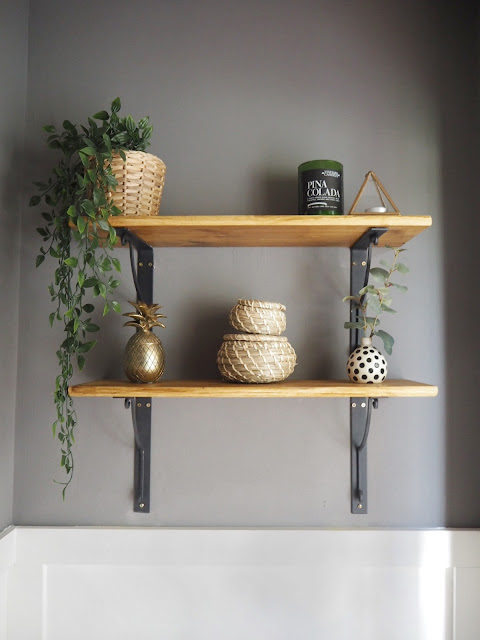
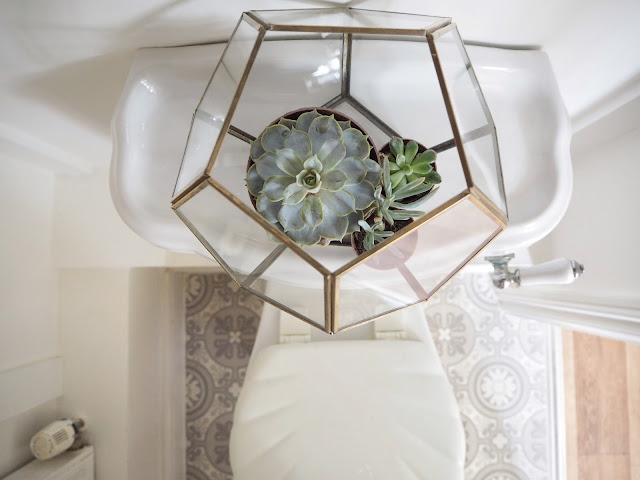
Finally I stained some more pine with wood dye to create oak-effect shelves (you can find a DIY tutorial here), and then to save even more money I accessorised with some things I already had, plus a couple of new bargain bits. The mirror was from Sass & Belle, plants from Homebase and Ikea, pineapple candle from Primark, the spotty vase is H&M, and the terrarium and basket that the plant is sat in were both very kindly gifted to me from Dunelm.
What it all cost
Wood for panelling - £6.41 per plank x5 from B&Q
Colour match paint - £18.99 per tin (Decorating Centre Online)
Wood primer - Ronseal Knot Block Primer £7, B&Q
Tile Paint - £15, Wilko
Tile-effect Lino - £32, eBay (*Aff link)
Total spend - £124.03
I'm so over the moon with how this has turned out - and just proves that you can make big changes with a teeny tiny budget and little to no DIY talent!I'd love to know what you think? Are you brave enough to go to the dark side?
Thanks for reading,
Sam Xx
*This post is not sponsored but does contain some affiliate links*


Looks great. Was the Lino hard to fit yourself? Thinking of doing similar.
ReplyDeleteThanks so much! No it was totally doable - there's a DIY post up now!
Delete